You'll discover the heart of Portlander Sarah Marshall's new cookbook by reading the fine print on its cover: "Recipes for whole-food canning and preserving locally grown, organic produce that helps fight food waste by transforming roots, tops, peels, seeds, stems, and cores into beautiful, delicious dishes."
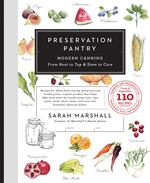
Portlander Sarah Marshall sees her new cookbook as "a fun way home cooks can decrease food waste."
Courtesy of Regan Arts
The 110 recipes in "Preservation Pantry, Modern Canning from Root to Top & Stem to Core" are culled from several years of experimenting with leftovers from the small-batch Marshall's Haute Sauce line produced by Sarah and husband Dirk Marshall.
"We make new seasonal sauces every month and I built up a lot of recipes" using what previously got tossed out, said Marshall. She sees her book as "a fun way home cooks can decrease food waste" by adapting commercial-kitchen techniques on a smaller scale. The book provides a wealth of detailed, highly visual step-by-step instruction on how to can and preserve our local bounty of fruits and vegetables.
More: Check Out The Recipe For Cheese And Onion Biscuits
Marshall grew up learning this way of life from her mother, a nurse and entrepreneur. "We were providing food for the family, gardening and cooking together," Marshall said. Too squeamish for nursing school, she became a family counselor, eventually teaching clients how to cook their own food and can together.
Between crisis intervention at work and dreams of trauma at night, "I canned at home to relax," she said. "I would process donated apples that I'd give back to the kids as applesauce." One day at the PSU Portland Farmers Market, picking up an end-of-day produce donation, "I realized I enjoyed the 'preserving' piece of the job more than the social work." Since starting her business in 2011, Marshall's hot-sauce booth has been a spring-to-fall mainstay at the same farmers market, where she buys her ingredients.

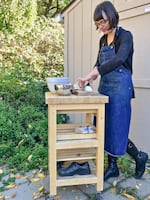
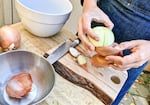
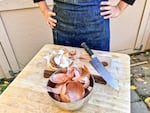
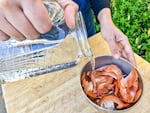
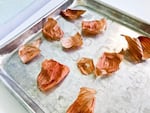
Portlander Sarah Marshall demonstrates how to transform onion skins into a powder that packs an onion punch.
Jo Mancuso / OPB
Marshall encourages people "to interact with the community in interesting ways" to fight food waste: Donate scraps and surplus; volunteer at a food bank; organize a community garden, canning club or food swap. She belongs to the Portland Preservation Society, launched years ago by Brooke Weeber, whose many watercolor illustrations enliven and illuminate the book's pages.
Marshall will be selling and signing books from 10 a.m. to 1 p.m. on Nov. 18 during the Oregon Olive Mill Olio Nuovo Festival Nov. 17–19 at Red Ridge Farms in Dayton, Oregon.
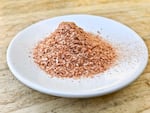
Onion Peel Powder
"Depending on the season, we can process up to 200 pounds of onions a week, which you can imagine leaves us with a huge quantity of onion skins! I used them in vegetable stocks and for my canning classes, but I was still left with buckets of onion waste. I decided to read up on the health benefits of onions and discovered that they actually store lots of antioxidants in their skins. The skins add a slight onion flavor and can also be substituted as a gluten-free alternative to asafoetida, a dried root with a sharp flavor that is used in Indian cooking." — Sarah Marshall
A Vitamix blender will produce a finer, more aerated powder, says Marshall. You can process the dried skins in batches in a small coffee or spice grinder, though the results will be chunkier. Those leftover onions can be used in her White Wine Marinara Sauce or Cherry Bomb Hot Sauce or the dish of your choice.
Prep: 30 minutes (plus drying time) |
Easy
Makes 3 tablespoons
Ingredient
- 4 cups yellow onion skins, loosely packed (from about 5 medium onions*)
*preferably organic
To prepare
- Separate each layer and get rid of any layers with spots. Place the skins in a bowl and cover with cold water. Let sit for 10 minutes and then drain. Rinse the skins under cold water, removing any stuck-on particles. Return to the bowl, cover with cold water, and let sit another 10 minutes. Drain the water and rinse the skins again. Compost any skins with dirt, spots, flesh of the onion, or multiple layers that will not come apart. Lay the skins between 2 tea towels and pat dry. Arrange on a drying rack, without the skins touching. Let air-dry for 48 hours, or dry on a baking sheet in the oven at 150 degrees F for 3 hours.
- Once the skins are completely dry, crumble them by hand into a dry blender. Secure the lid and lay a towel over the top of the lid to collect any onion dust. Turn the blender on high and let it run for 5 minutes, until the onion skins are powdered.
Store in an airtight jar out of direct sunlight for up to 6 months.
Tips
- Make sure the skins are very clean and dry. Moisture and dirt are enemies if you want to keep this powder in your pantry.
- This same technique also works for shallots.

Homemade Onion Skin Powder is the secret ingredient that gives depth of flavor to these easy Cheese and Onion Biscuits, which travel well and can be served hot or cold.
Caleb Plowman / Courtesy of Regan Arts
Cheese and Onion Biscuits
"These are the perfect biscuits to take on a picnic or to a potluck. You can stuff them full of ham or partner them with fried chicken. They are quick, easy, and great to eat hot or cold — and they’re cute as a button. The onion skins add antioxidants, which compensates for the decadent butter and cheese! If you didn’t make the Onion Peel Powder, you can substitute with 1 teaspoon of store-bought onion powder." — Sarah Marshall
Prep: 15 minutes (plus baking) |
Easy
24 mini biscuits
Ingredients
- 2 cups all-purpose flour
- 1 tablespoon baking powder
- 1 tablespoon Onion Peel Powder
- 1/2 teaspoon kosher salt
- 1/4 teaspoon cayenne powder
- 1 cup buttermilk
- 1 egg
- 1/2 cup butter, room temperature
- 1 garlic clove, finely minced
- 1-1/2 cups extra sharp cheddar cheese, shredded
To prepare
- Preheat the oven to 450 degrees F. Place silicone baking mats* onto two 12-x-16 baking sheets. In a large bowl, combine the flour, baking powder, Onion Peel Powder, salt, and cayenne with a whisk. [*Marshall prefers "no paper waste" silicone mats but you can substitute parchment paper]
- In a separate bowl (or using a stand mixer), whisk the buttermilk, egg, butter, and garlic. Scrape down the bowl and beaters. Add the dry ingredients half a cup at a time. Then fold in the cheese with a rubber spatula. Use a 1-inch ice cream scoop with a trigger to scoop the batter into balls on the mats. Bake in the oven for 10 minutes, until golden brown. Serve immediately.
Tip: Whenever I refer to "shredded cheese," I am always referring to cheese that you shred yourself by hand. Store-bought shredded cheese has added ingredients that keep it from melting.
Excerpted from "Preservation Pantry, Modern Canning from Root to Top & Stem to Core," copyright 2017 by Sarah Marshall. Biscuits photo copyright 2017 by Caleb Plowman. Republished with permission from Regan Arts.
